How to set up a proxy with the Proxy SwitchyOmega
Proxy SwitchyOmega is a browser extension. It allows you to skip changing your browser settings each time you need to enable or disable proxy. Making those changes may be rather annoying. Especially if you have two or more proxies and switch between them frequently. From this guide, you will learn how to set up litport.net proxies in SwithchyOmega extension and how to use them.
If you still don’t have this super helpful tool in your arsenal, you can add it to your browser following the links below:
Google Chrome
Mozilla Firefox
Opera
Note: For this guide, we used Google Chrome Version 81.0.4044.138. Though it will look pretty much the same for any other Chrome browser version.
To add the Proxy SwitchyOmega extension, open the link we have shared above and click on Add to Chrome.
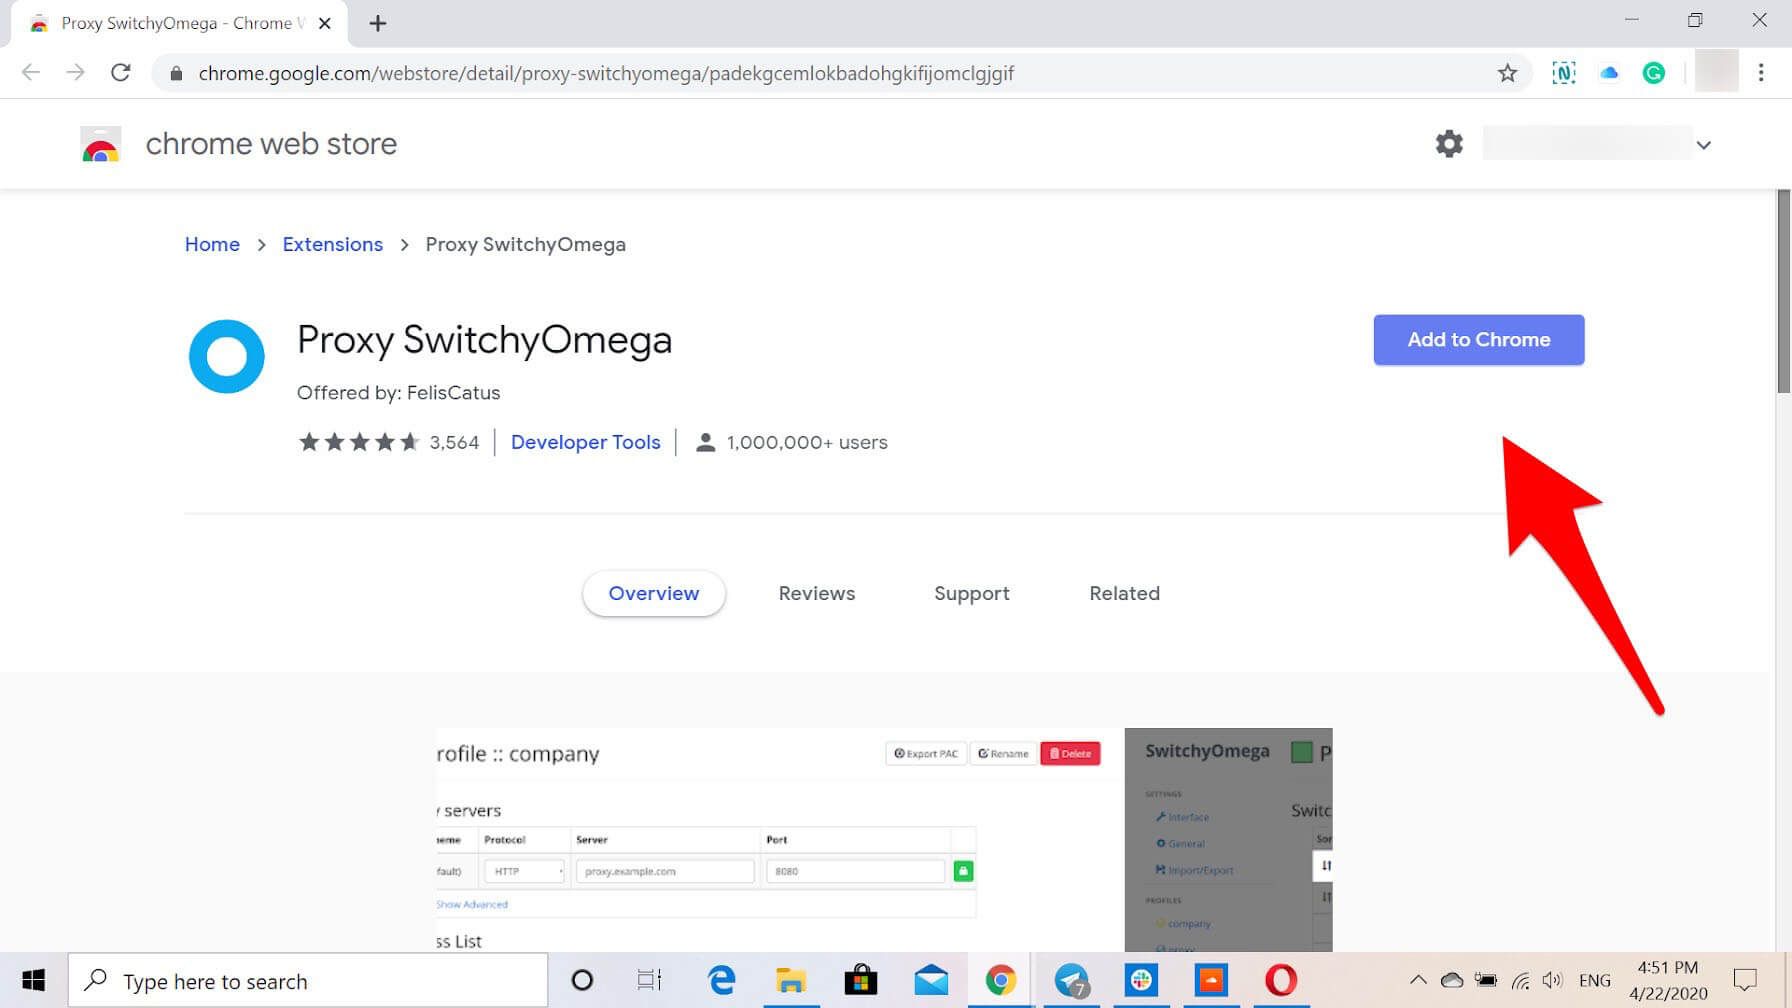
Proxy SwitchyOmega extension
On the next step you will see a confirmation request. Here you’ll need to confirm your intention to add SwitchyOmega to your browser. Press Add extension.
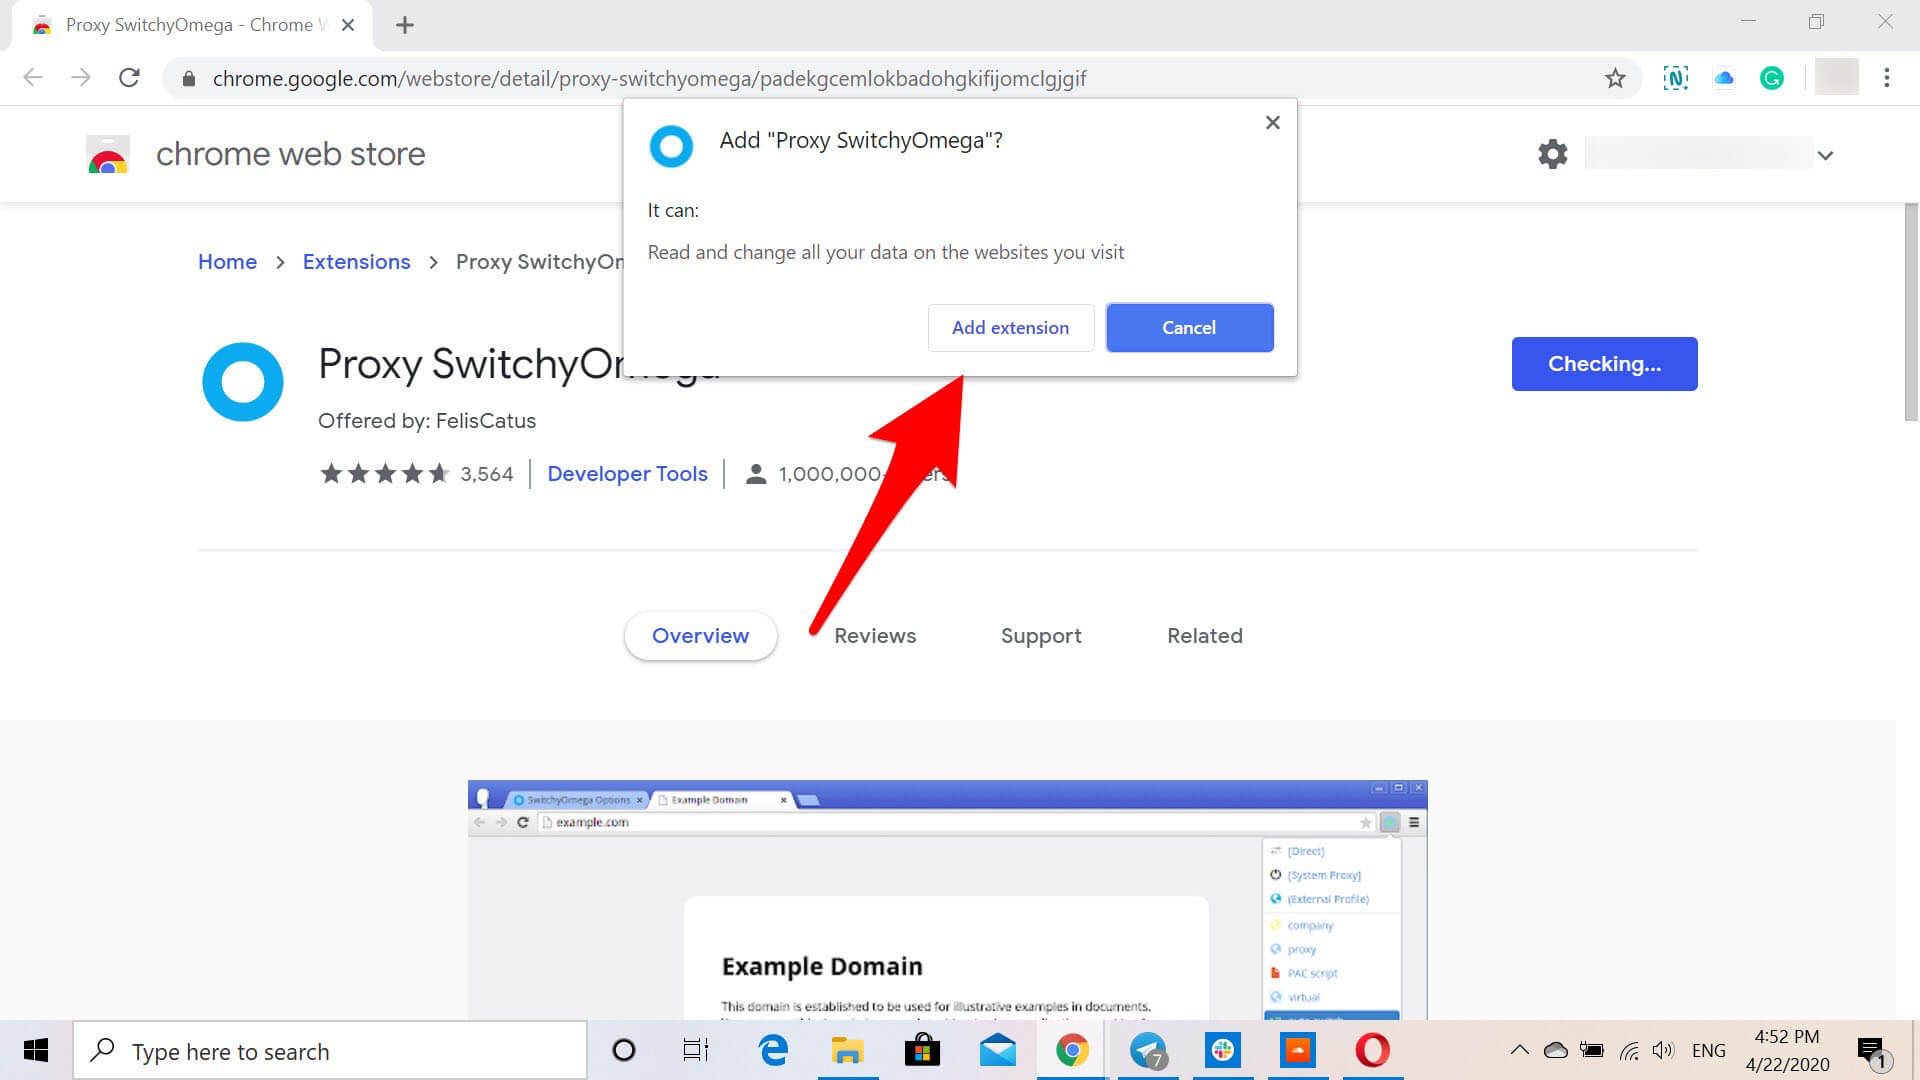
Proxy SwitchyOmega extension
Now you have added the extension to your Chrome browser. SwitchyOmega offers a quite helpful guide, so we recommend to watch it. Click Next for that. We’ll Skip guide though and go on with setting up the proxy.
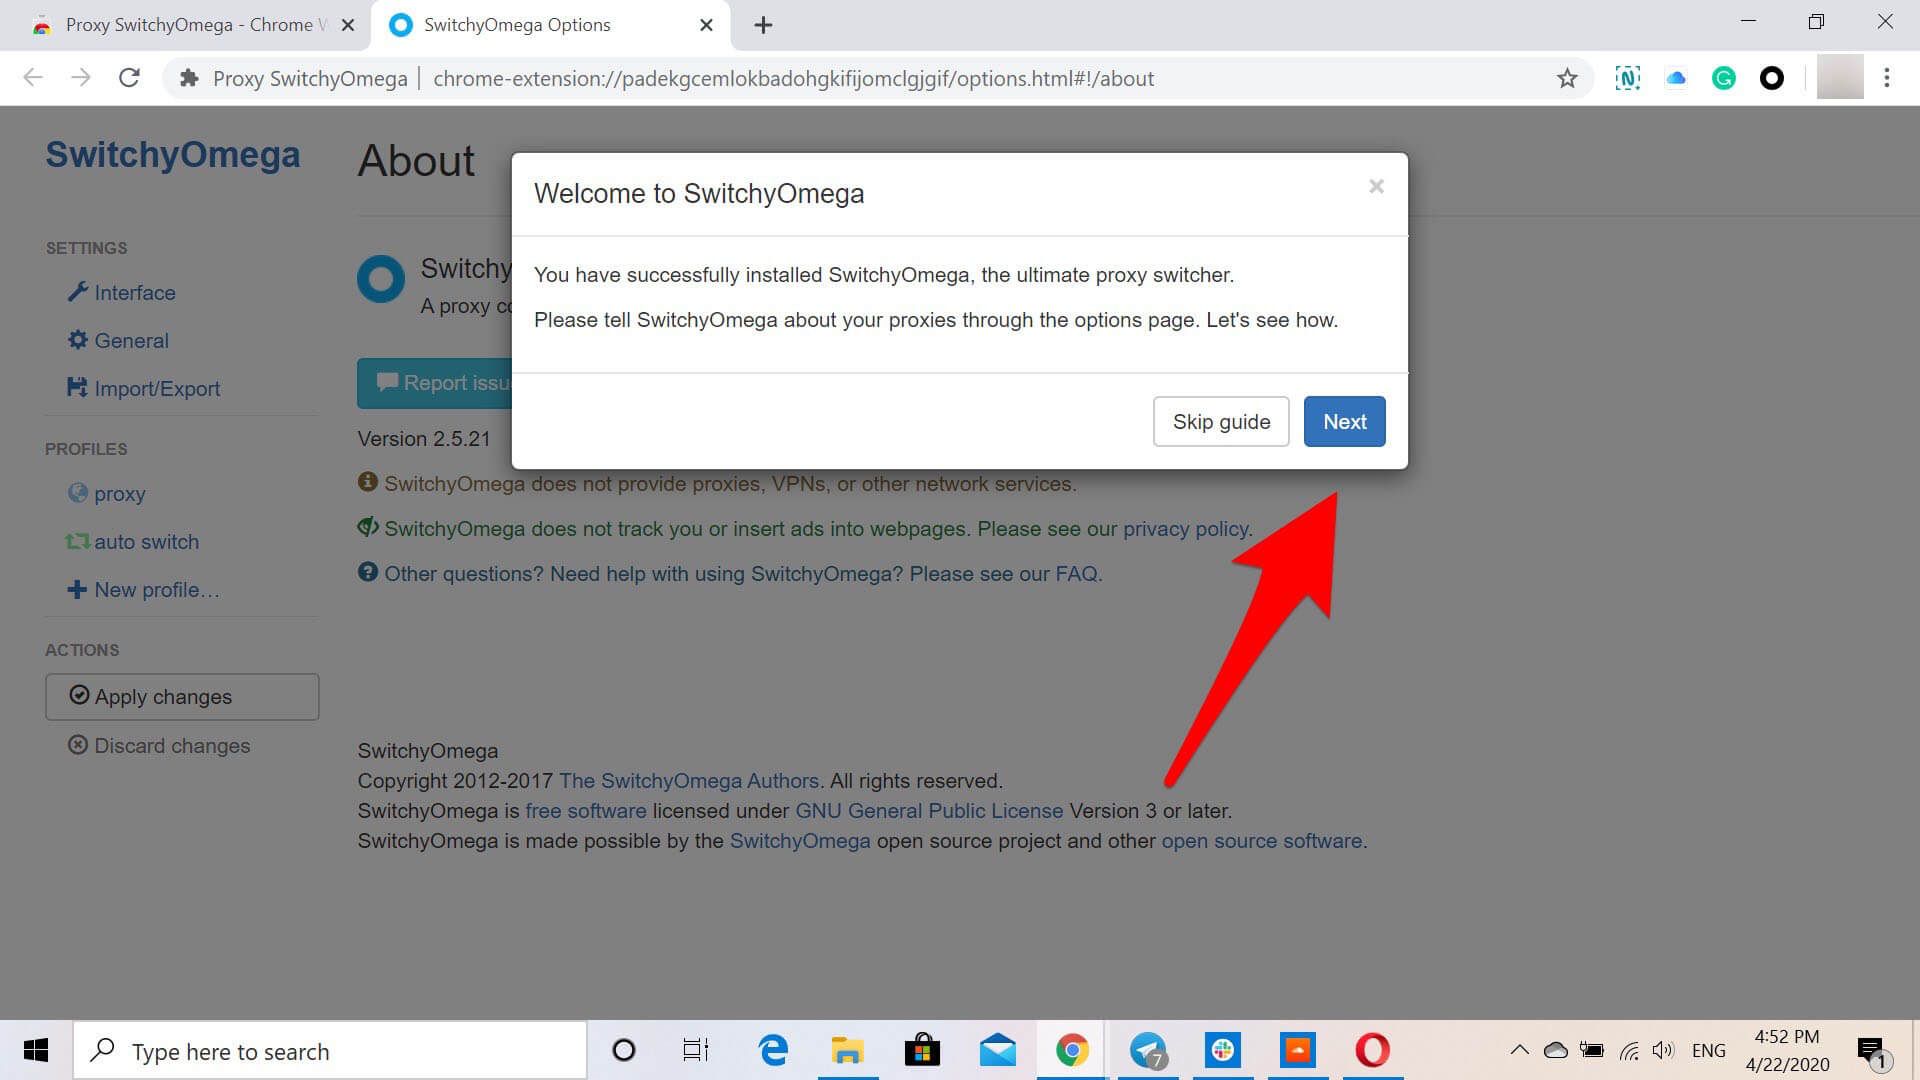
Welcome to SwitchyOmega
After watching the extension guide you already have an idea of how it works. So we’ll guide you on how to configure litport.net proxy in SwitchyOmega and how to use it. Now you have a Proxy SwitchyOmega icon at the top-right corner of your browser. Click on it and select Options from the extension menu.
Proxy SwitchyOmega menu
On the Options page, you will see all the SwitchyOmega settings available. Select New profile item.
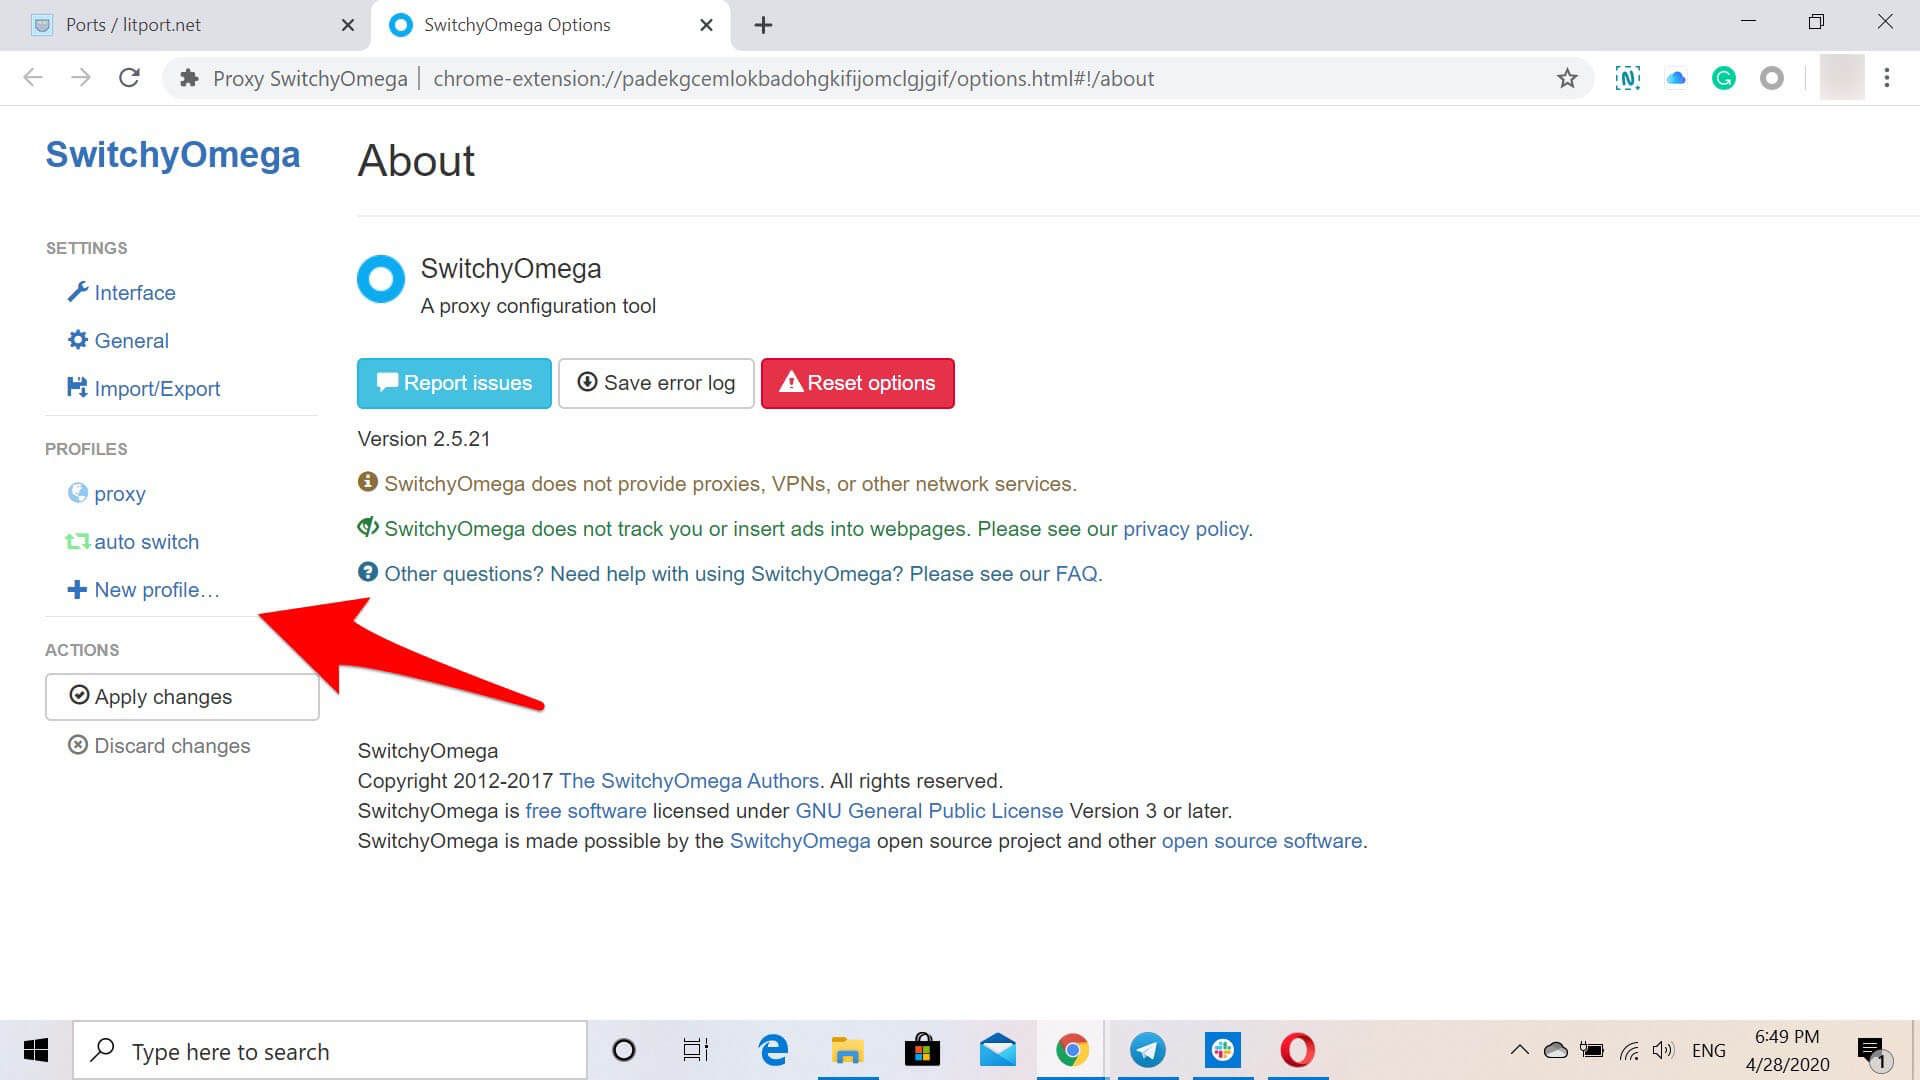
SwitchyOmega settings
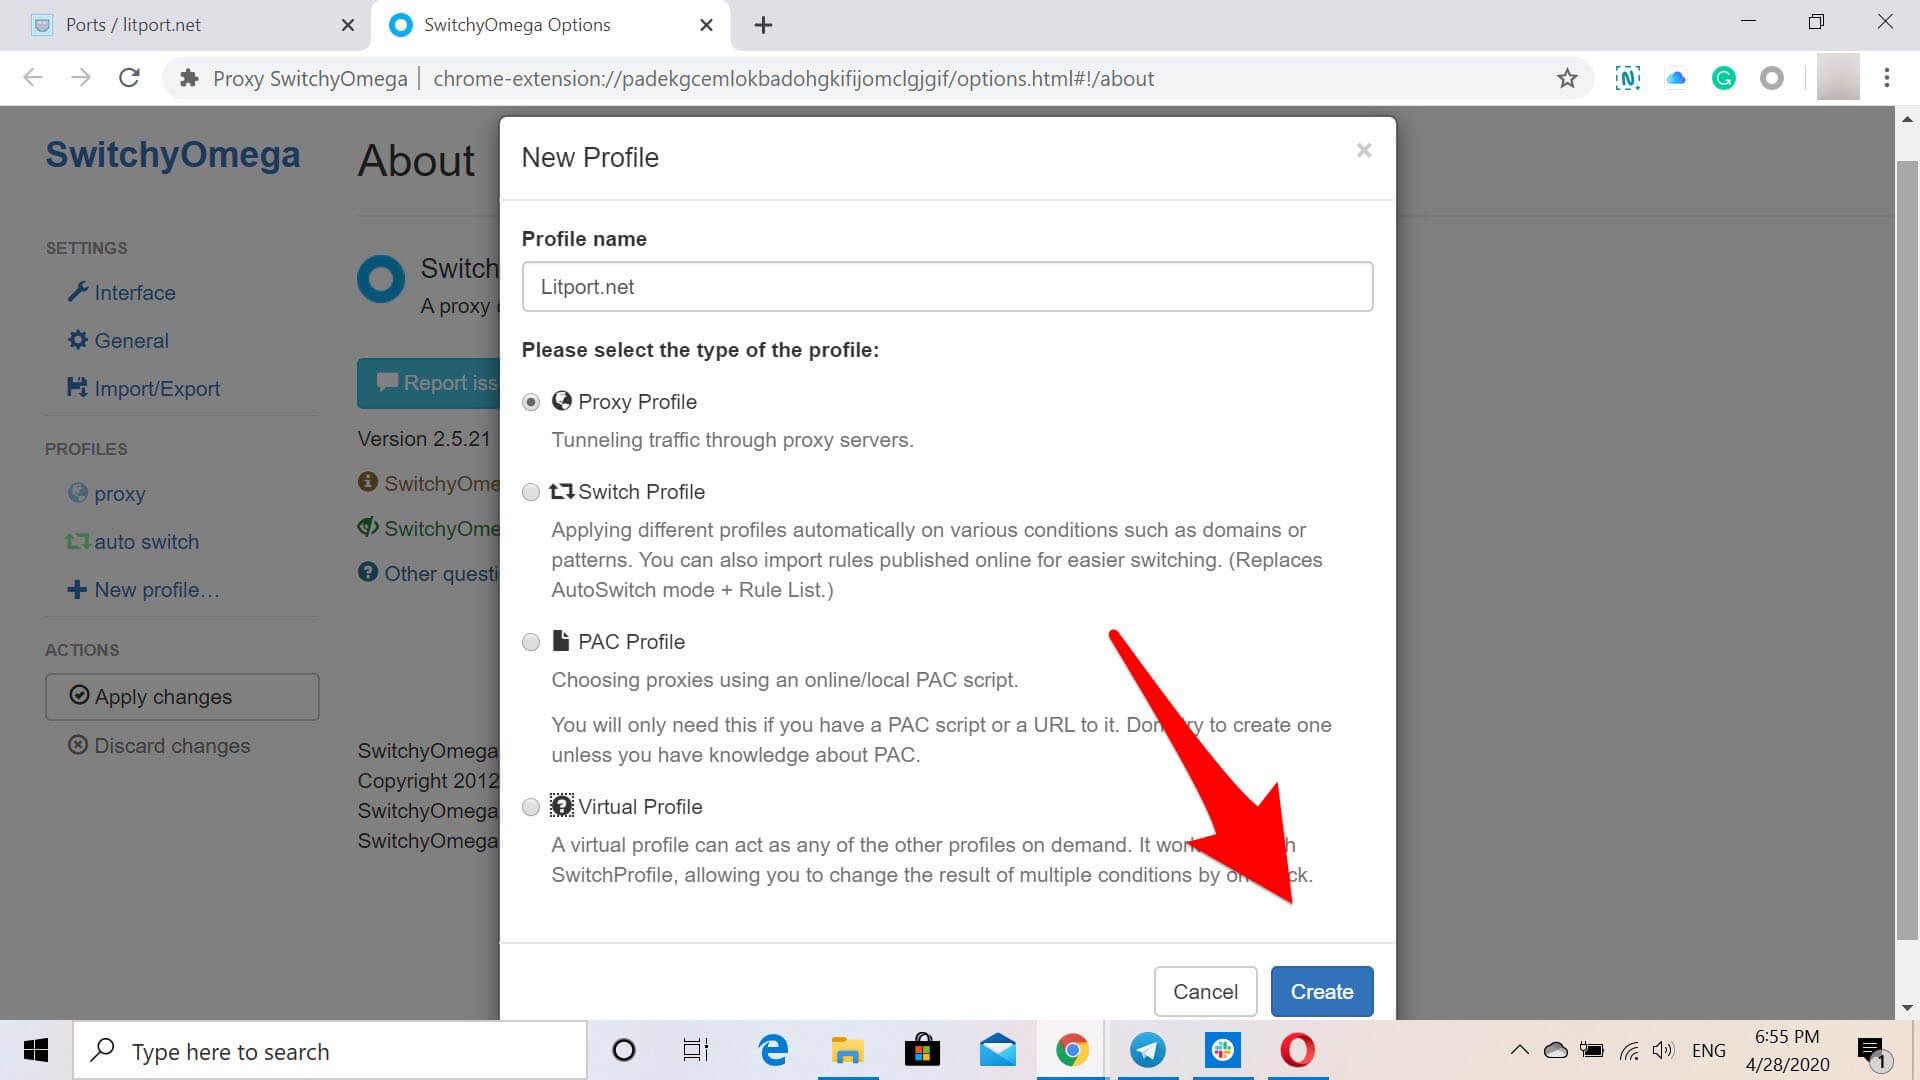
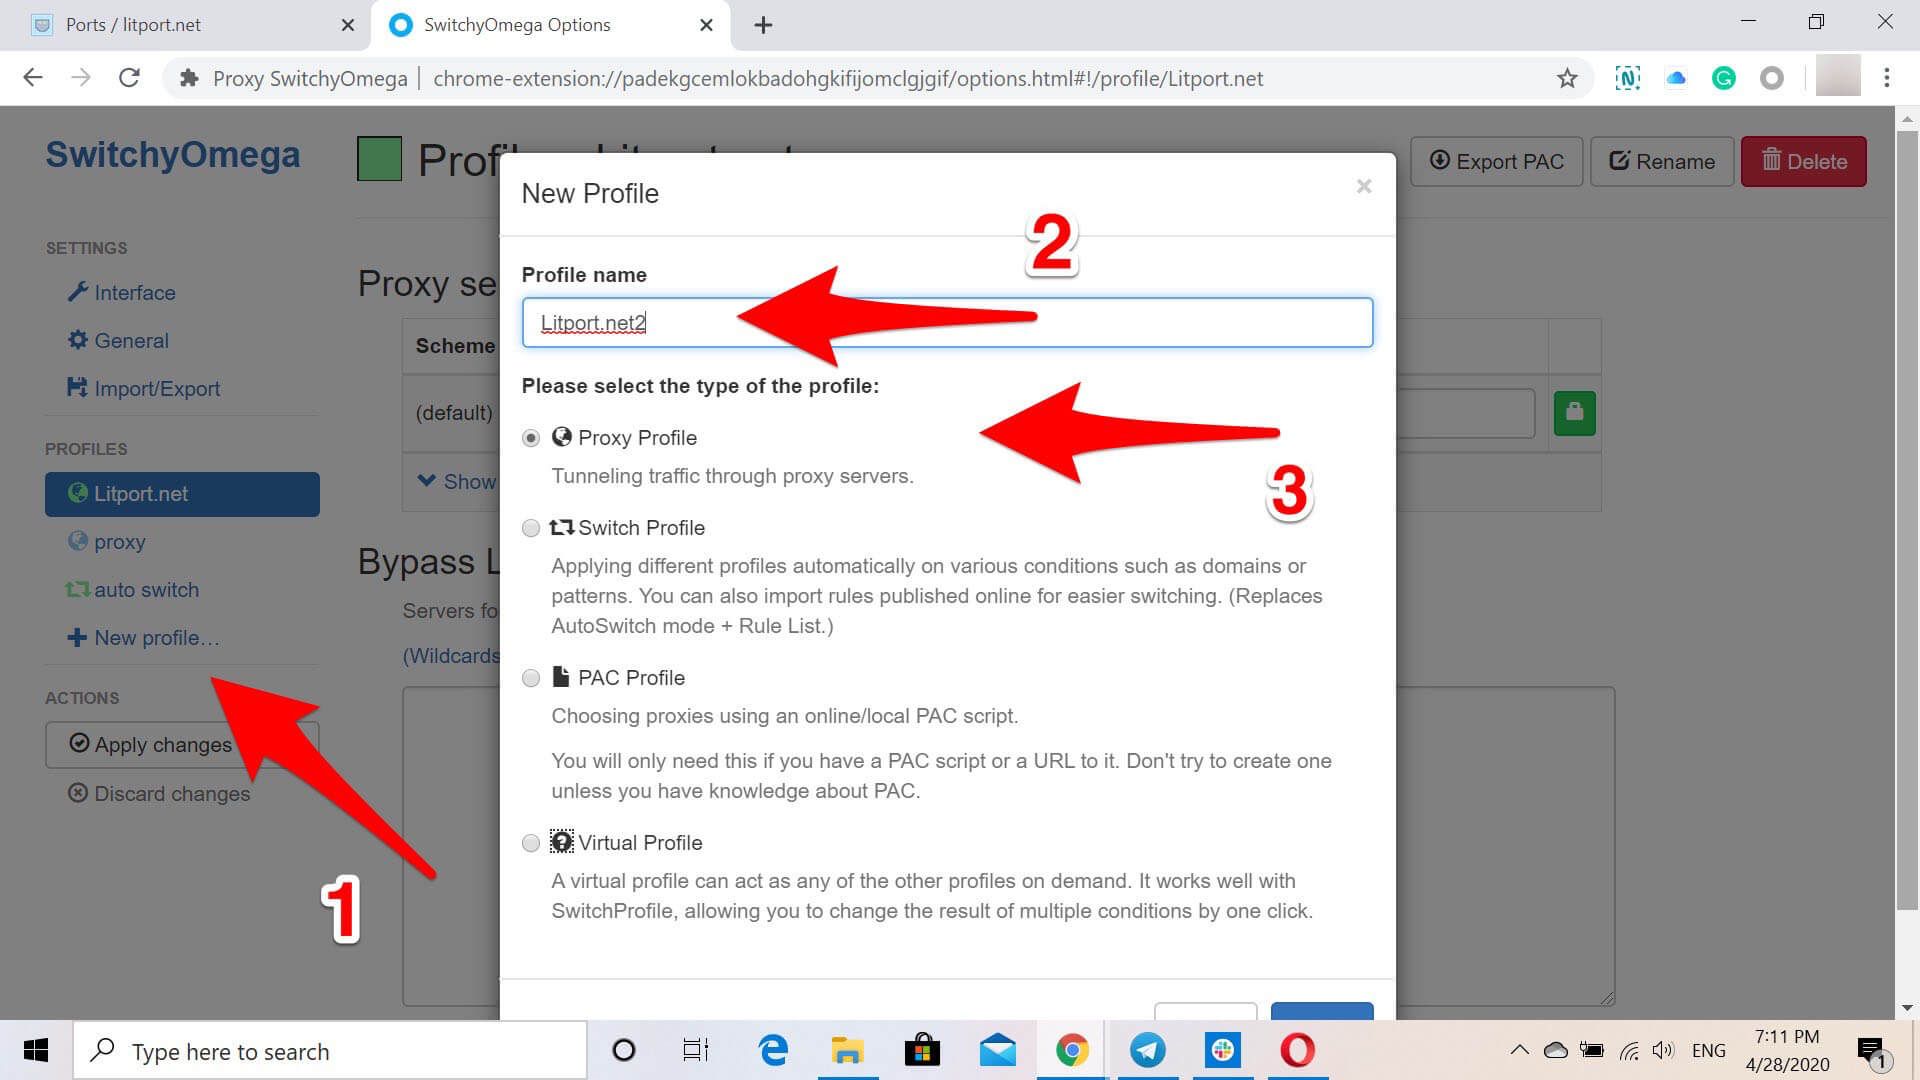
Add the name of the profile on the next step. If you have several different proxies, it may be helpful to add the location or the carrier to the profile name. For example, LitportLA or LitportAT&T, etc. Make sure to select Proxy Profile from the profile type list.

Creating a new profile in SwitchyOmega extension
Hit the Create button to continue configuring the proxy in SwitchyOmega for Chrome.
Creating a new profile in SwitchyOmega extension
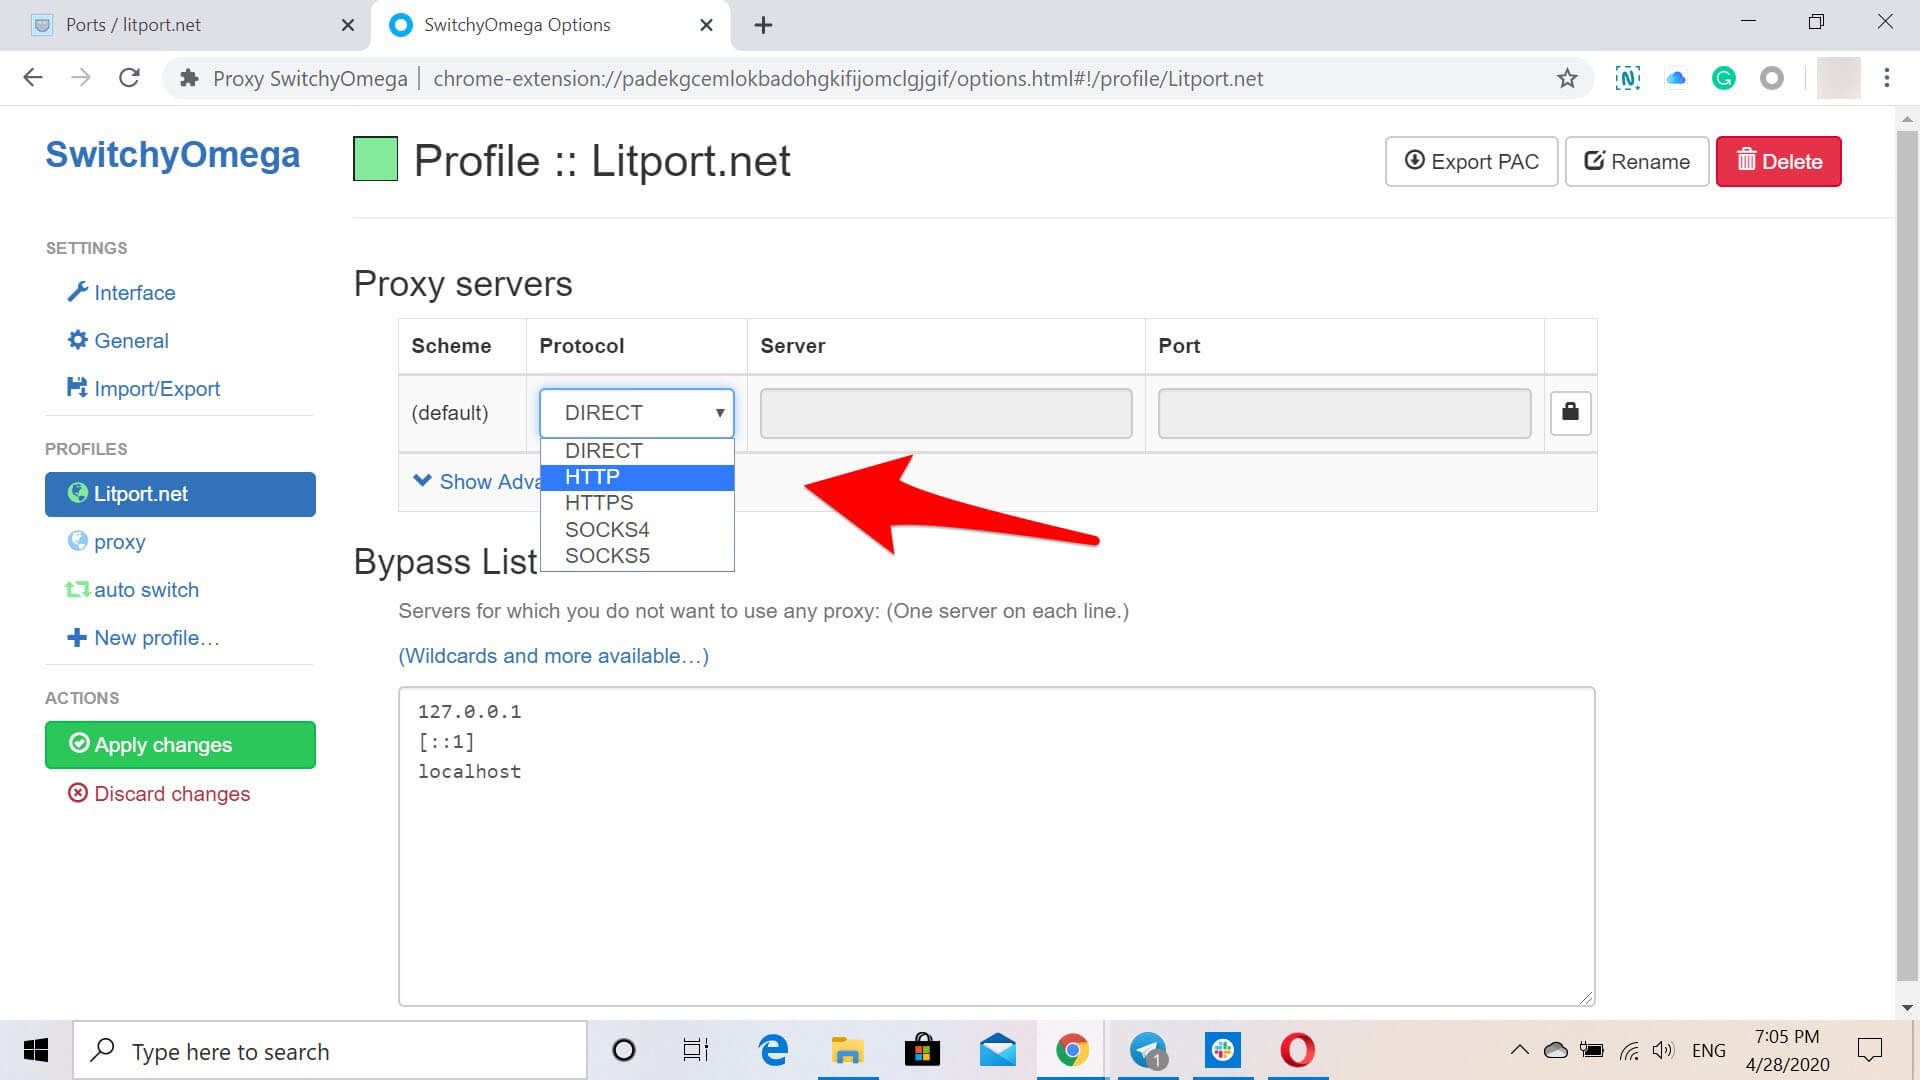
Now you have a new proxy profile ready for configuring and we are going to set it up.

Proxy profile settings in SwitchyOmega
Make sure you select HTTP from the protocol list, otherwise, the proxy won’t work.
Proxy profile settings in SwitchyOmega
For the next step you will need to get the credentials of the proxy from your litport.net dashboard. Here you will see 12 digits in a Host line - that is the Server. Copy and paste it from your litport.net dashboard to the Server box.
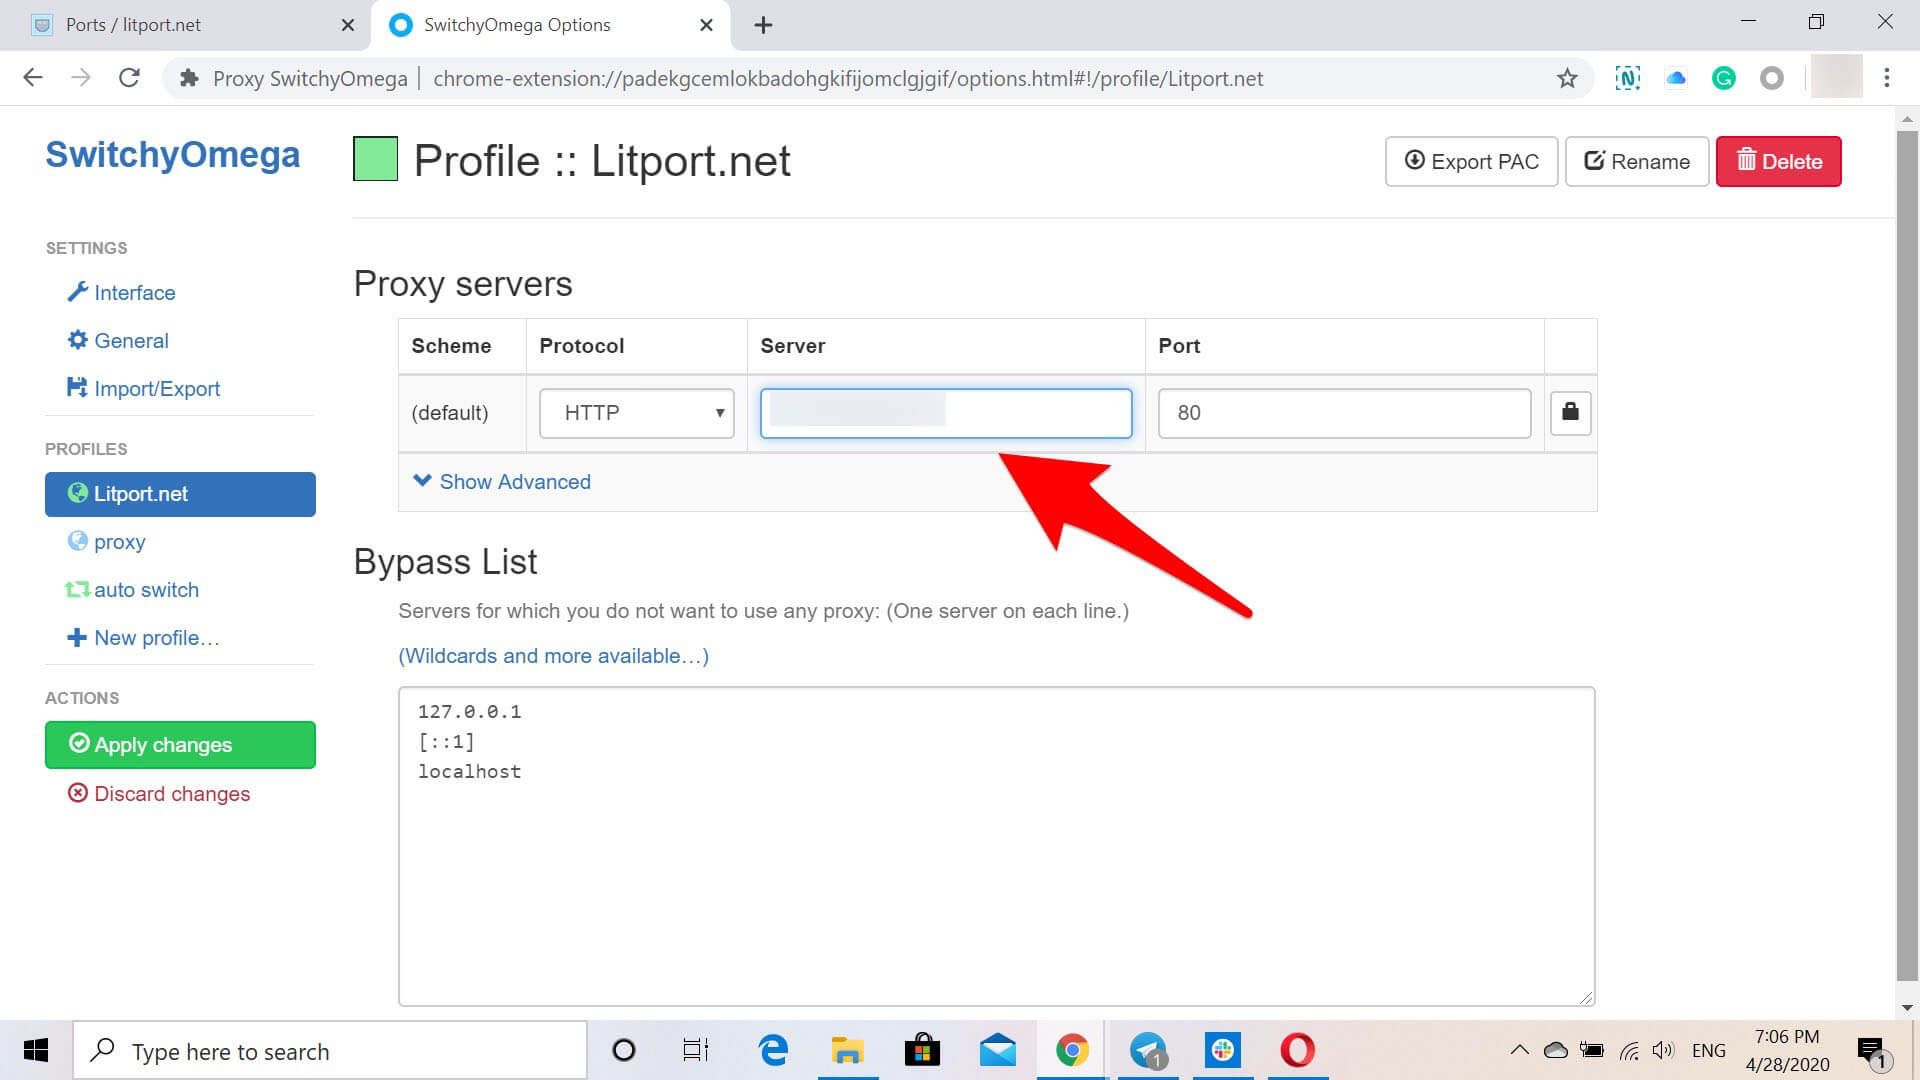
Proxy profile settings in SwitchyOmega
You will also find another 4 digits in a Host line after the colon on your litport.net dashboard - that’s the Port. Copy and paste it into the Port box.
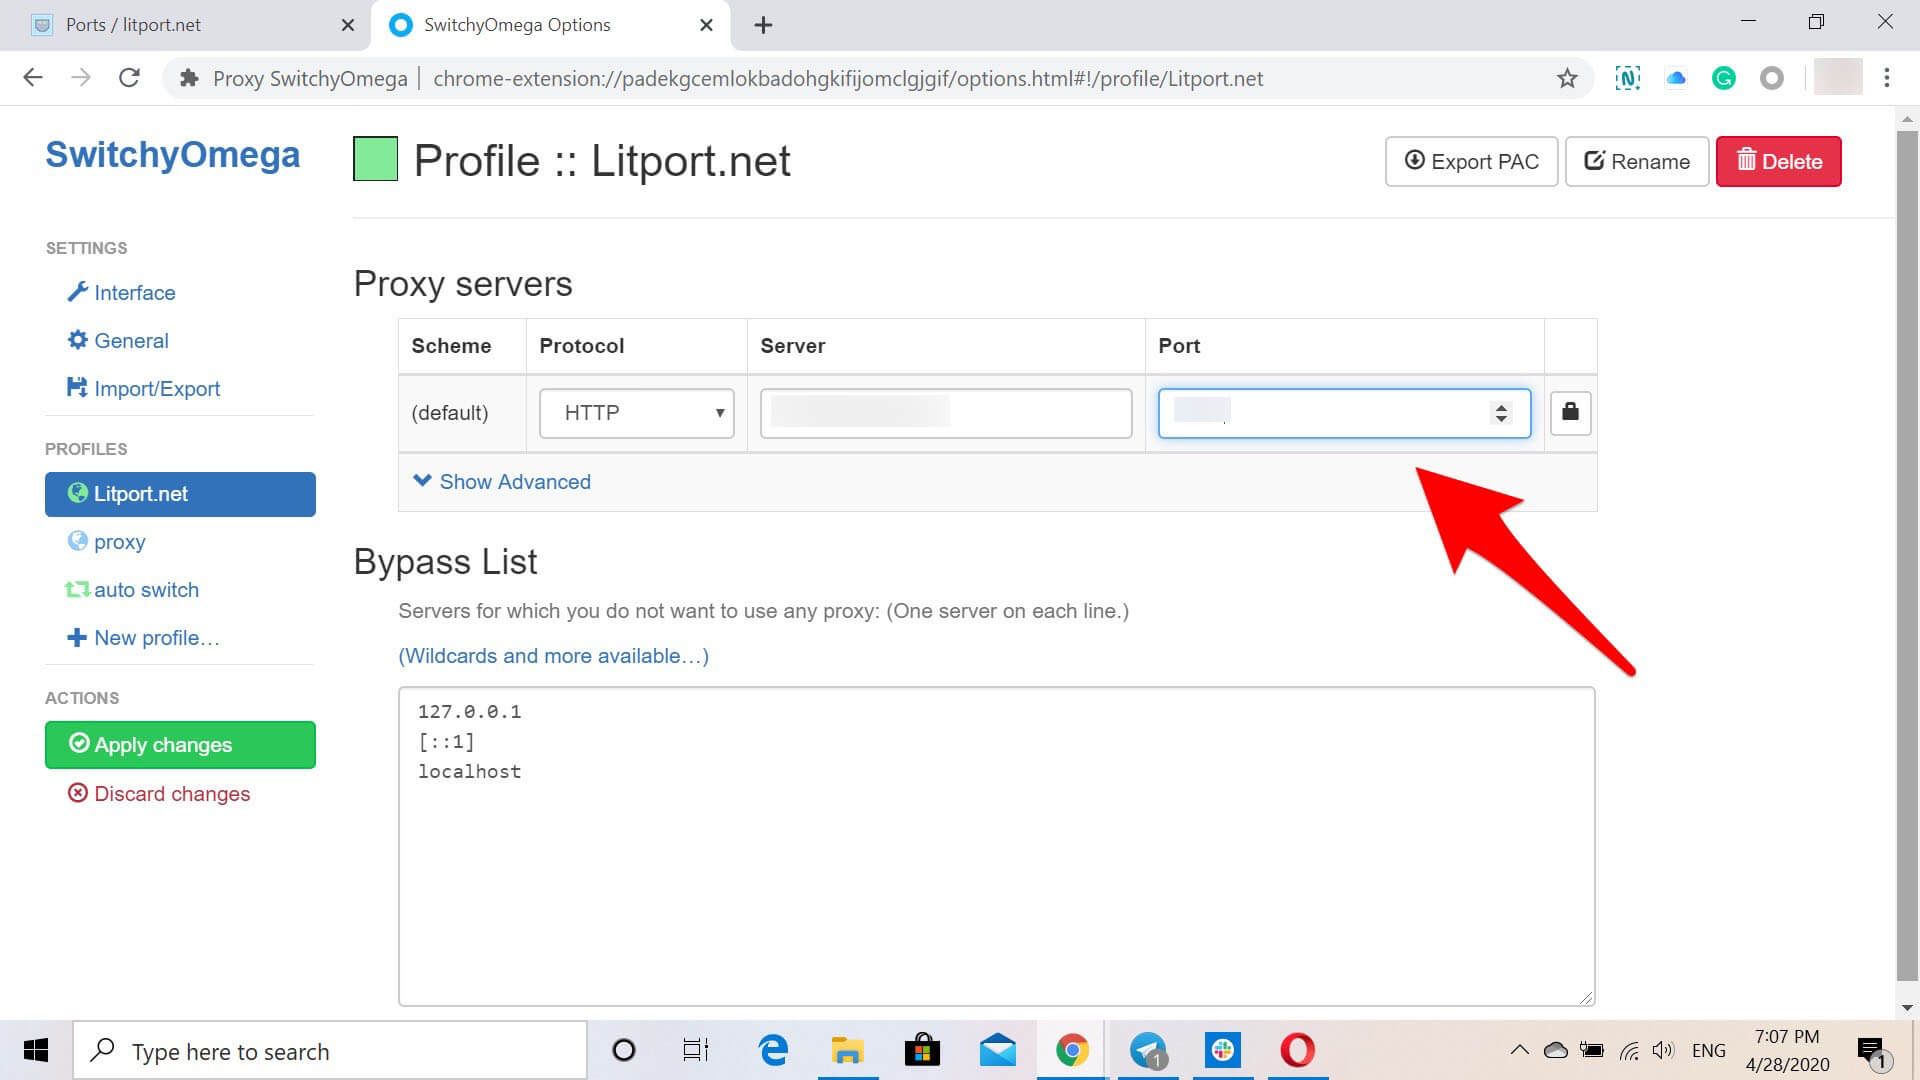
Proxy profile settings in SwitchyOmega
Now we are going to set up proxy authentication. Press the lock icon to continue.
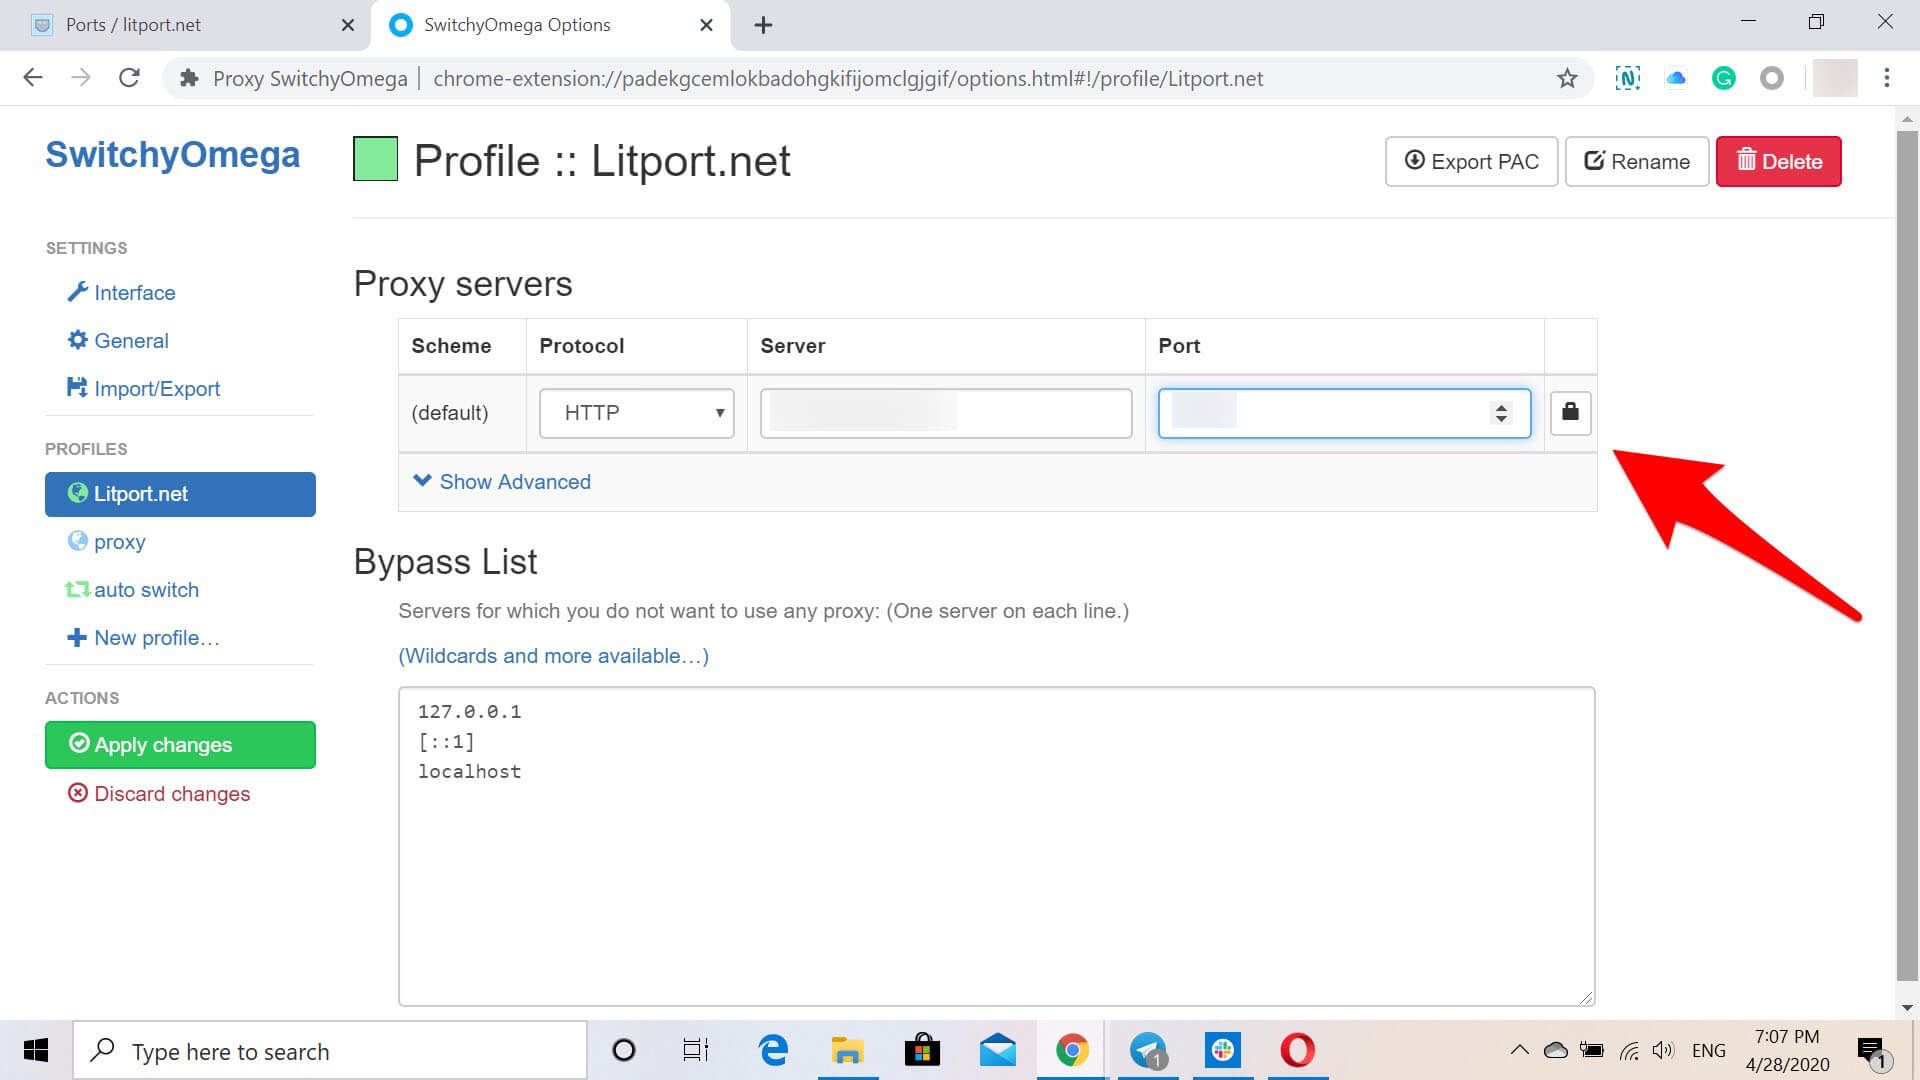
Proxy profile settings in SwitchyOmega
You will need Login and Password from your Litport.net dashboard to configure Proxy Authentication
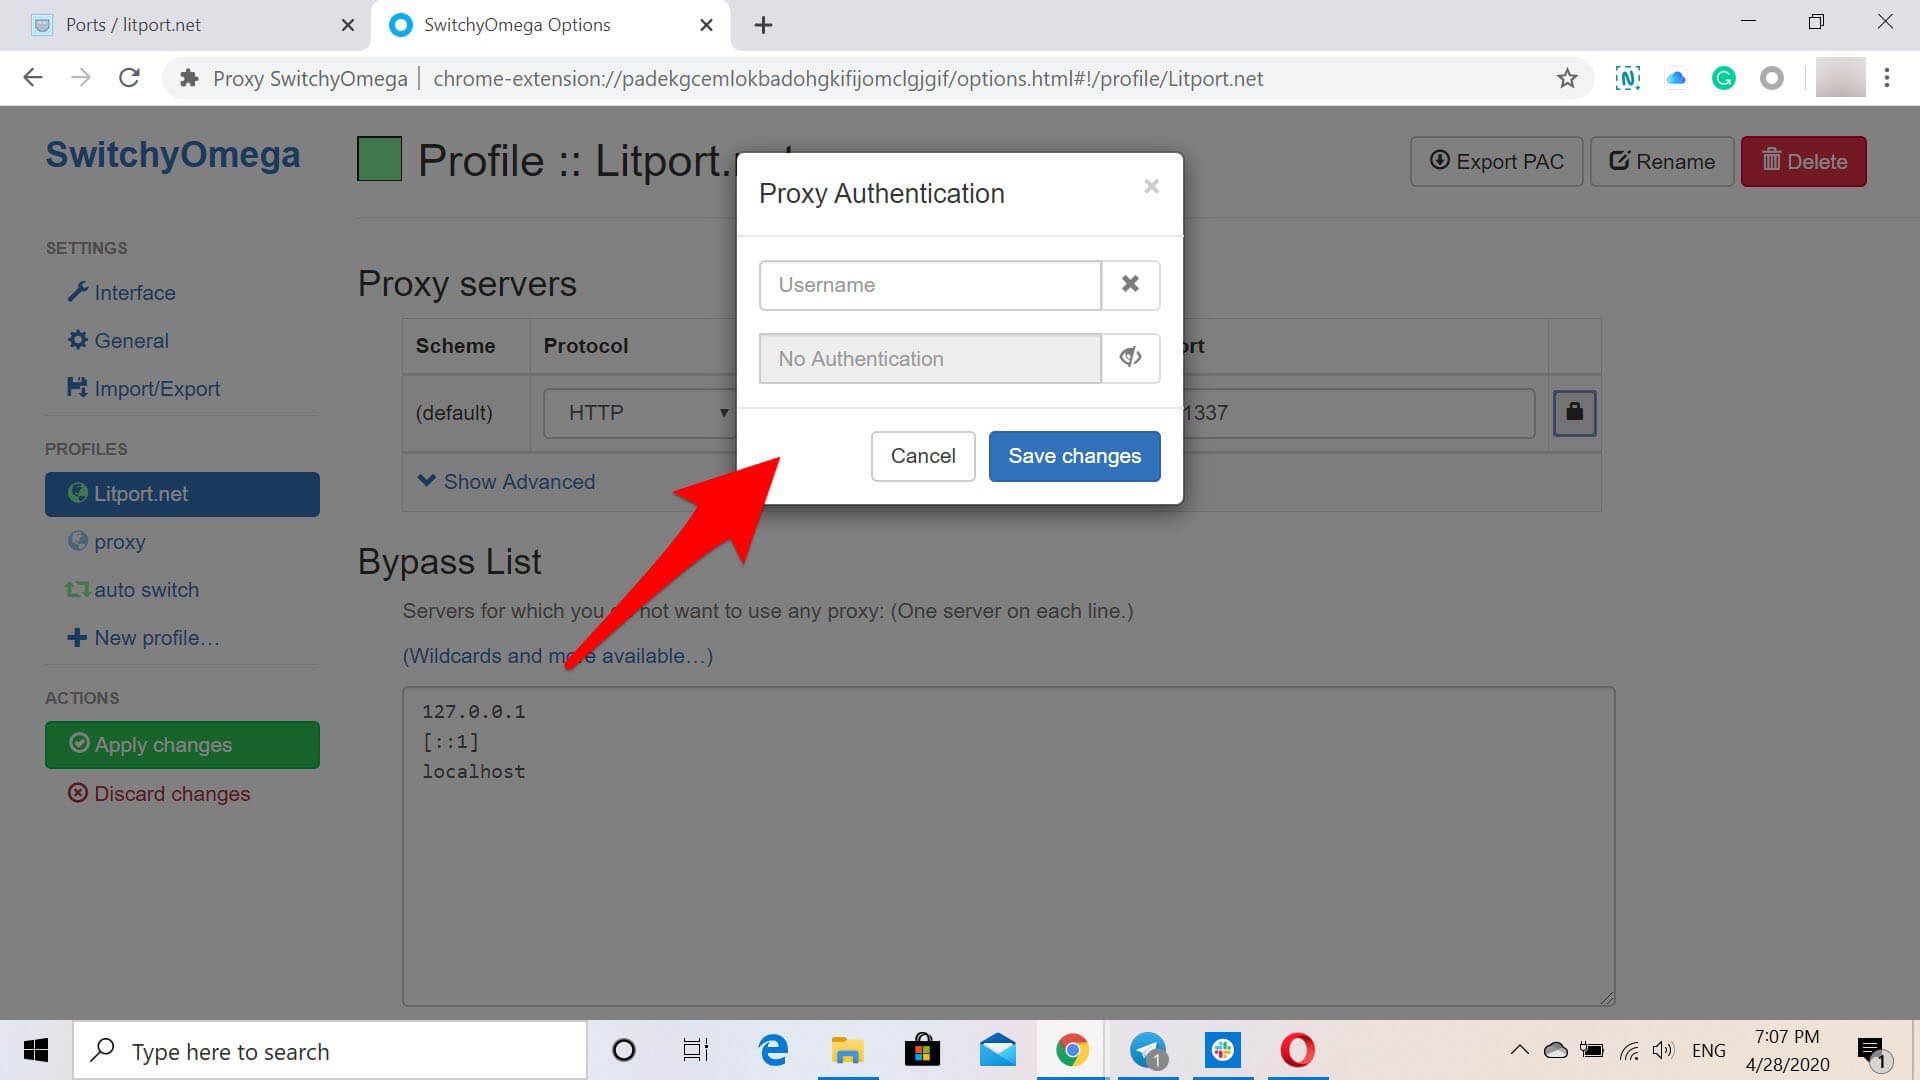
Proxy Authentication setting in SwithyOmega extension
Copy and paste or type Login into the Username box and Password - into the box below. Click Save changes to continue.
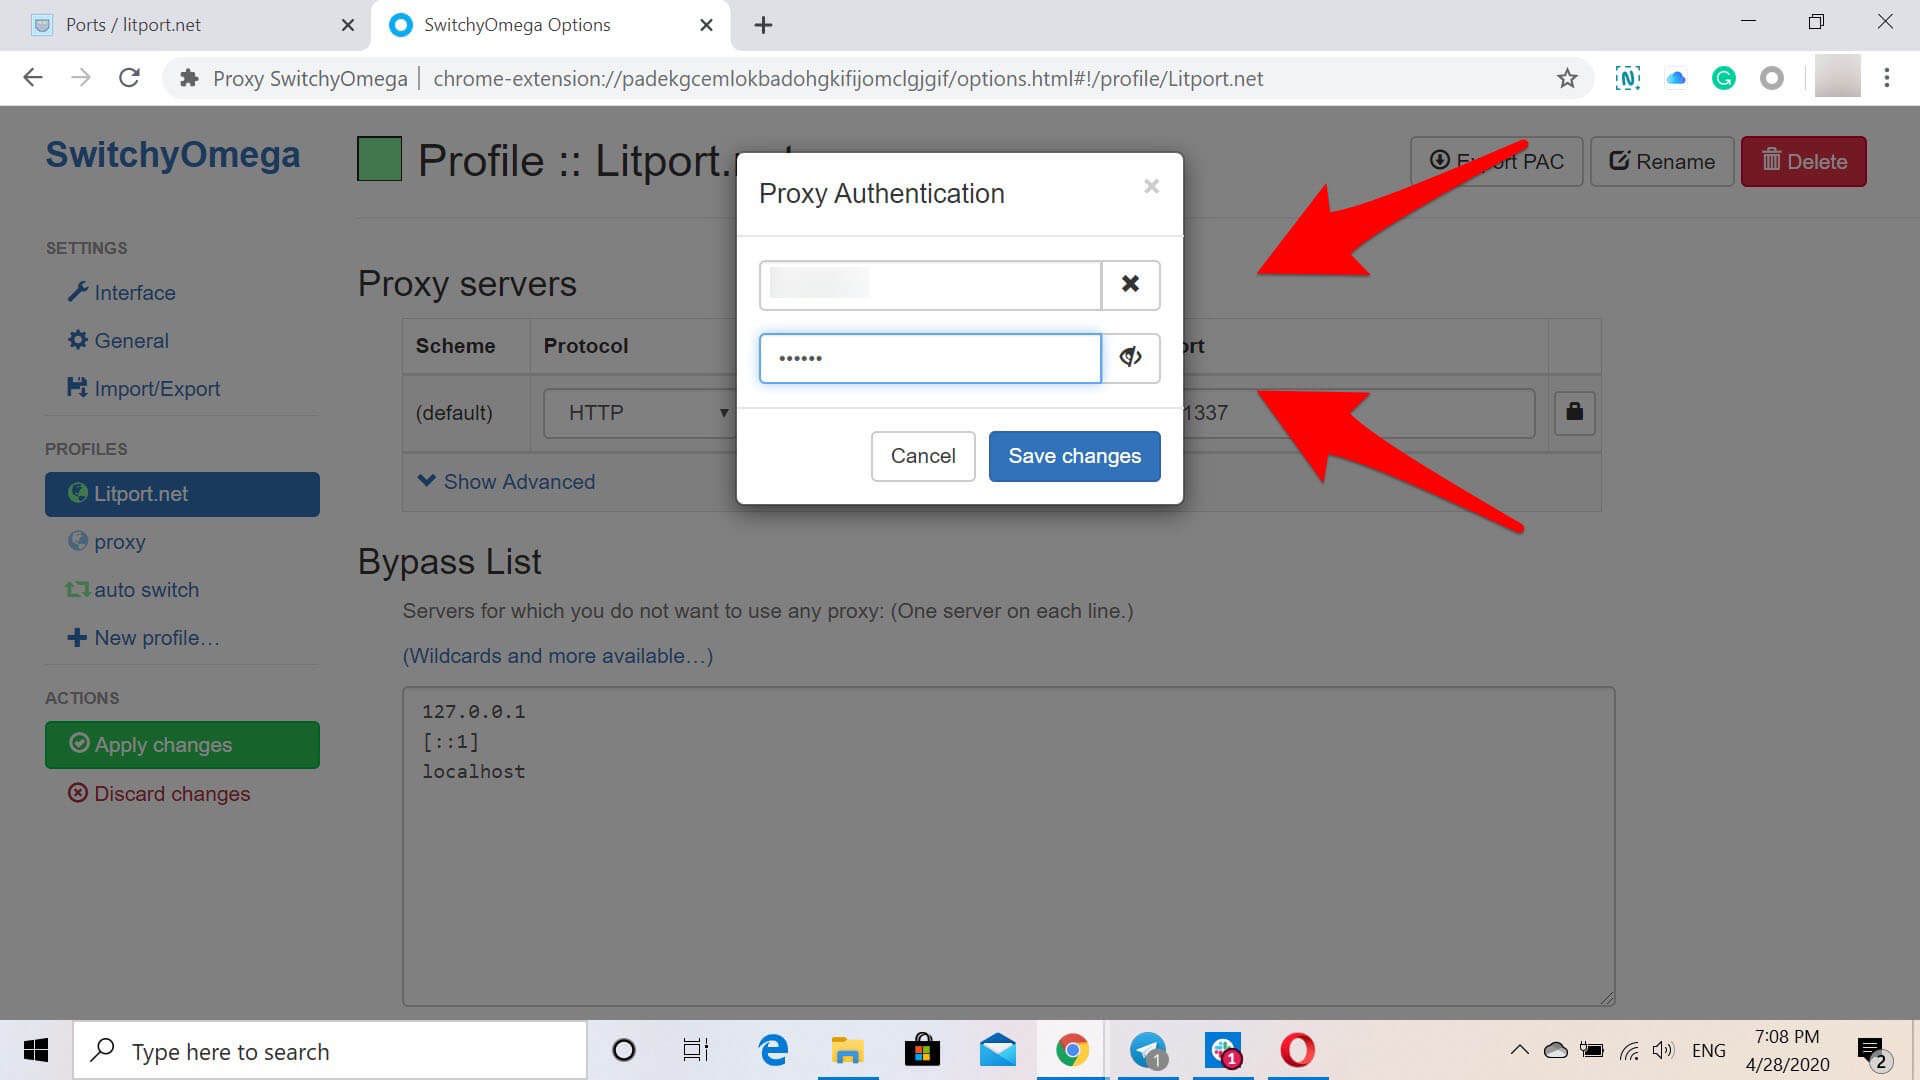
Proxy Authentication setting in SwithyOmega extension
If you would like to add a list of websites you don’t want to use any proxies for, you can do it in Bypass List. We don’t have any such servers, so we’ll keep this list blank.
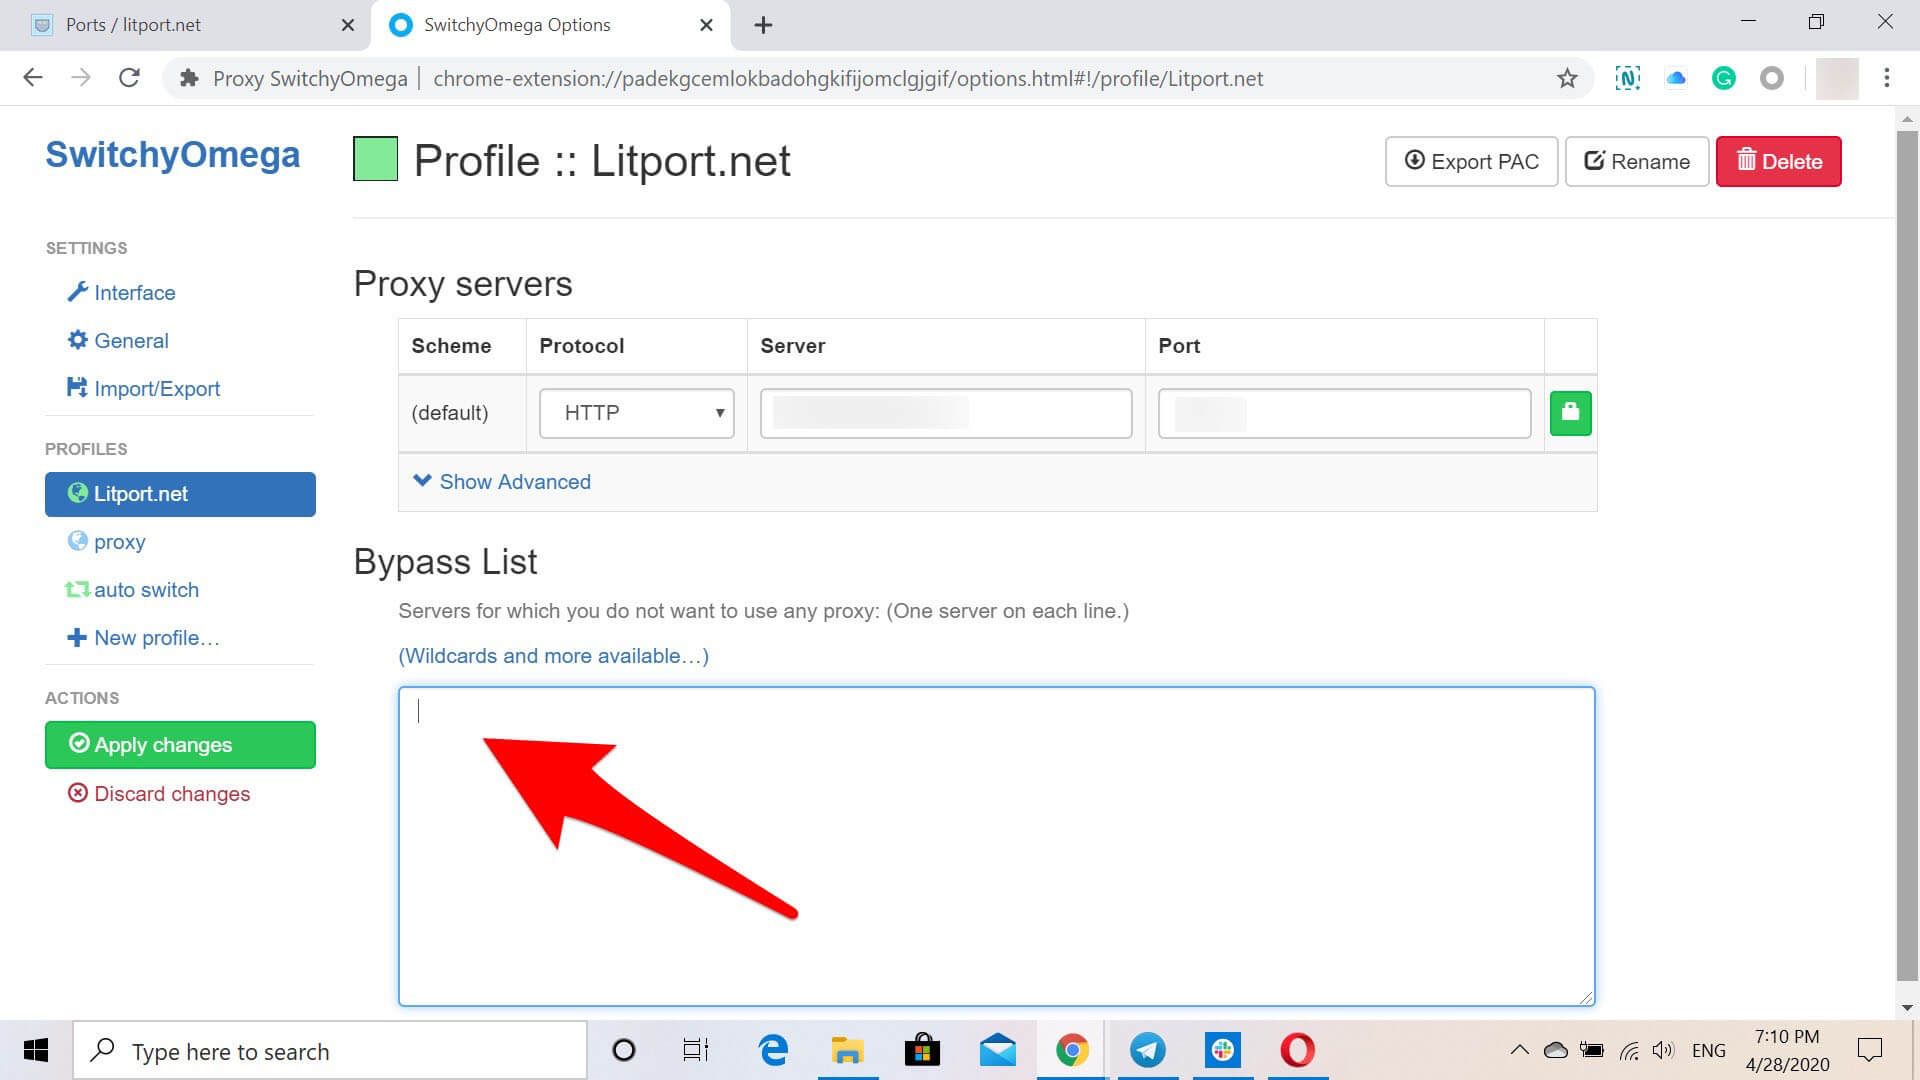
Proxy profile setting in SwithyOmega extension
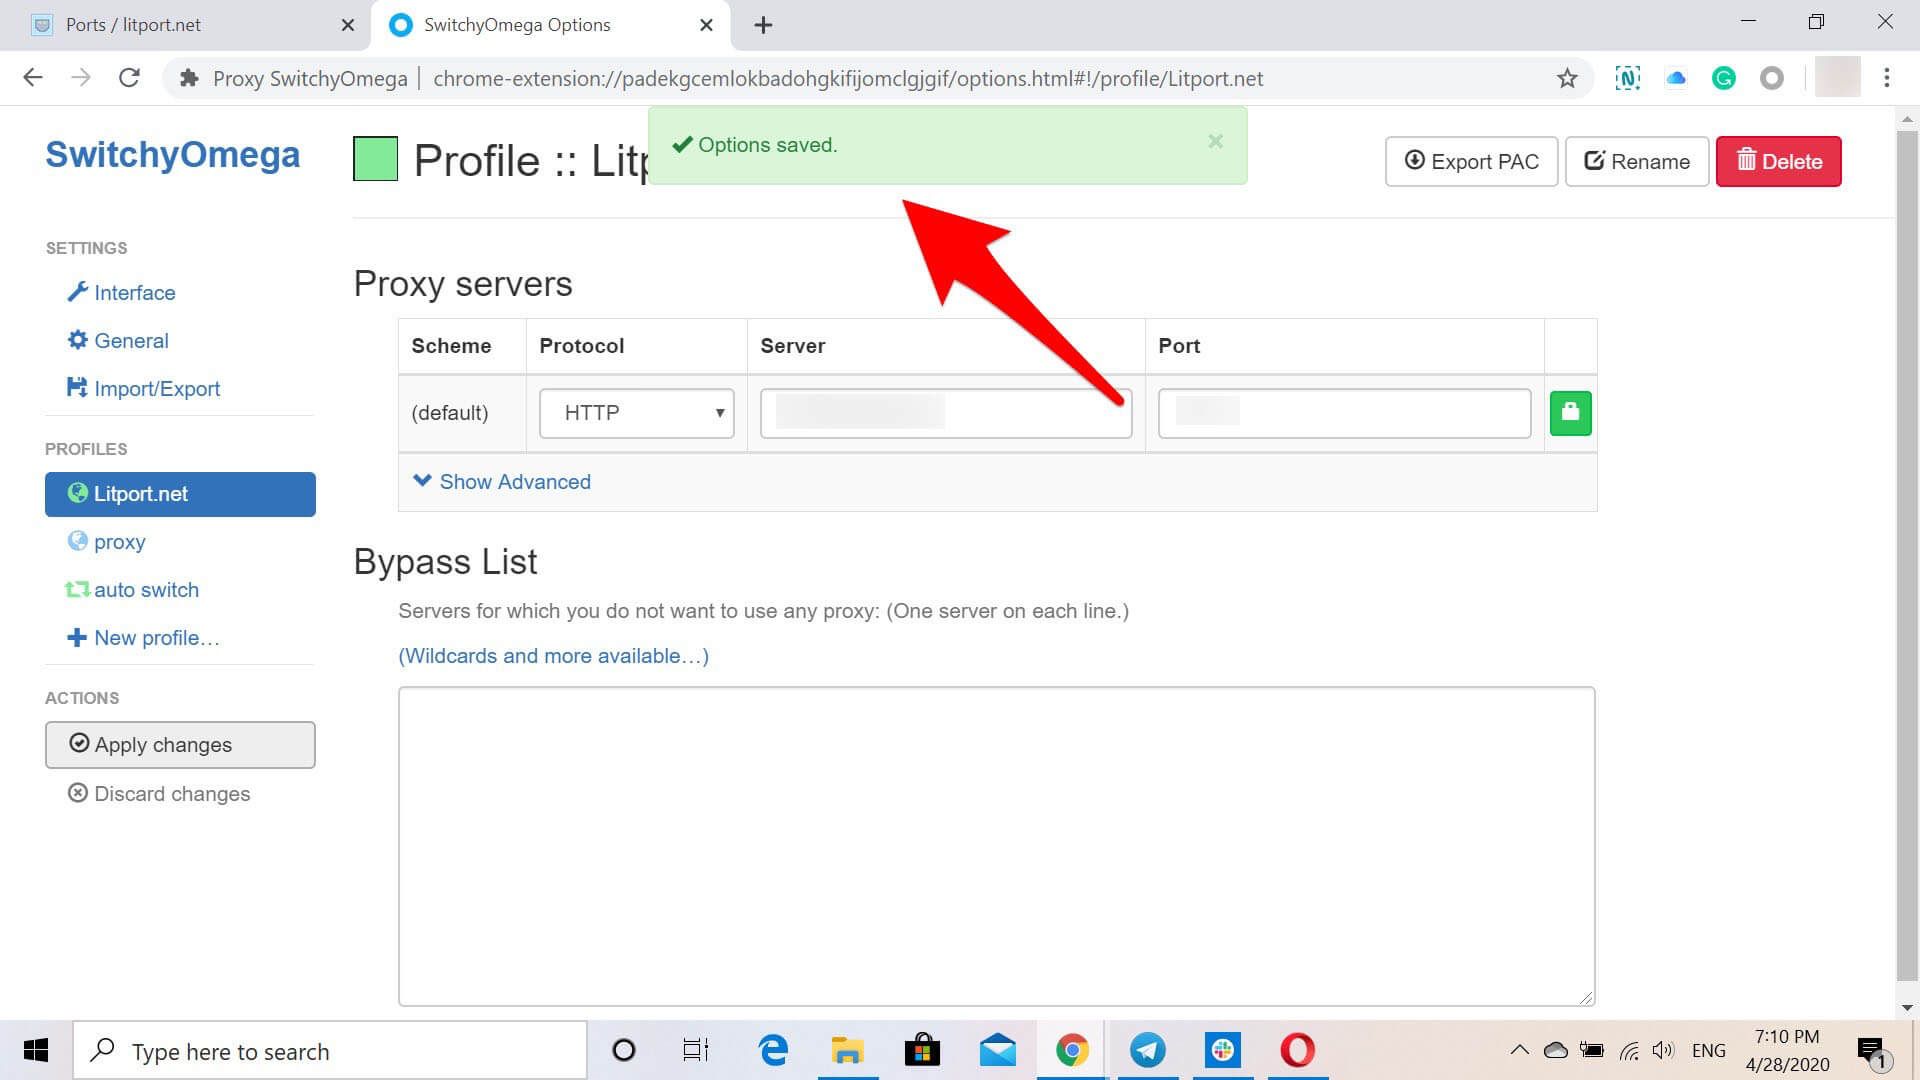
To save all the changes in your proxy profile settings make sure to click on Apply changes. Otherwise, all the information will be lost and you’ll have to insert all the credentials once again.

Proxy profile setting in SwithyOmega extension
You will see a notification if all the settings are saved. In case you are using only one proxy, you are all set up now. So you can skip the next two steps of the guide. If you have two or more proxies, let’s configure them as well.
Proxy profile setting in SwithyOmega extension
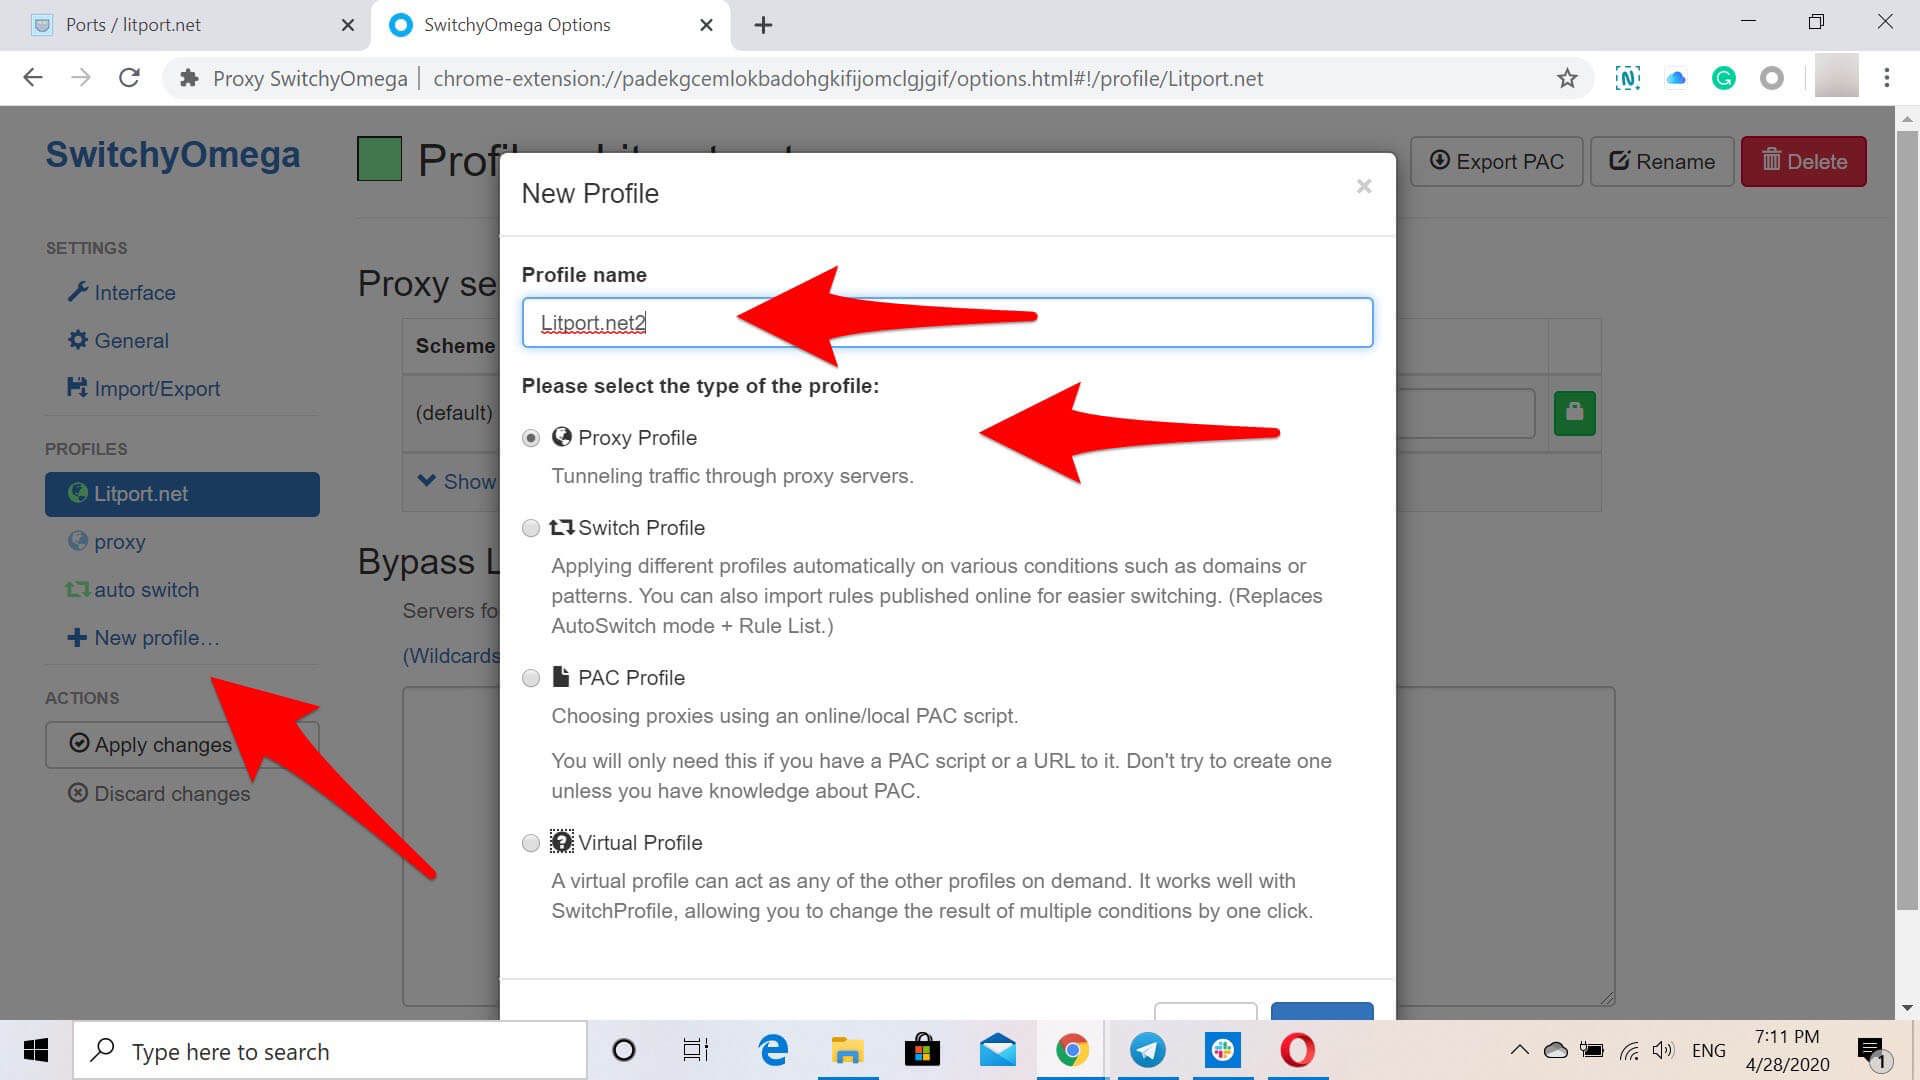
To add one or several more proxies to SwitchyOmega tool we’ll create a new profile the same way we did that in steps 5-16. So press New Profile. Type a preferred name for it and make sure Proxy Profile is selected from the profile type list. To finish configuring a new proxy profile just follow the steps 9-16. You can add as many profiles as you wish.
Creating a new profile in SwitchyOmega extension
Creating a new profile in SwitchyOmega extension
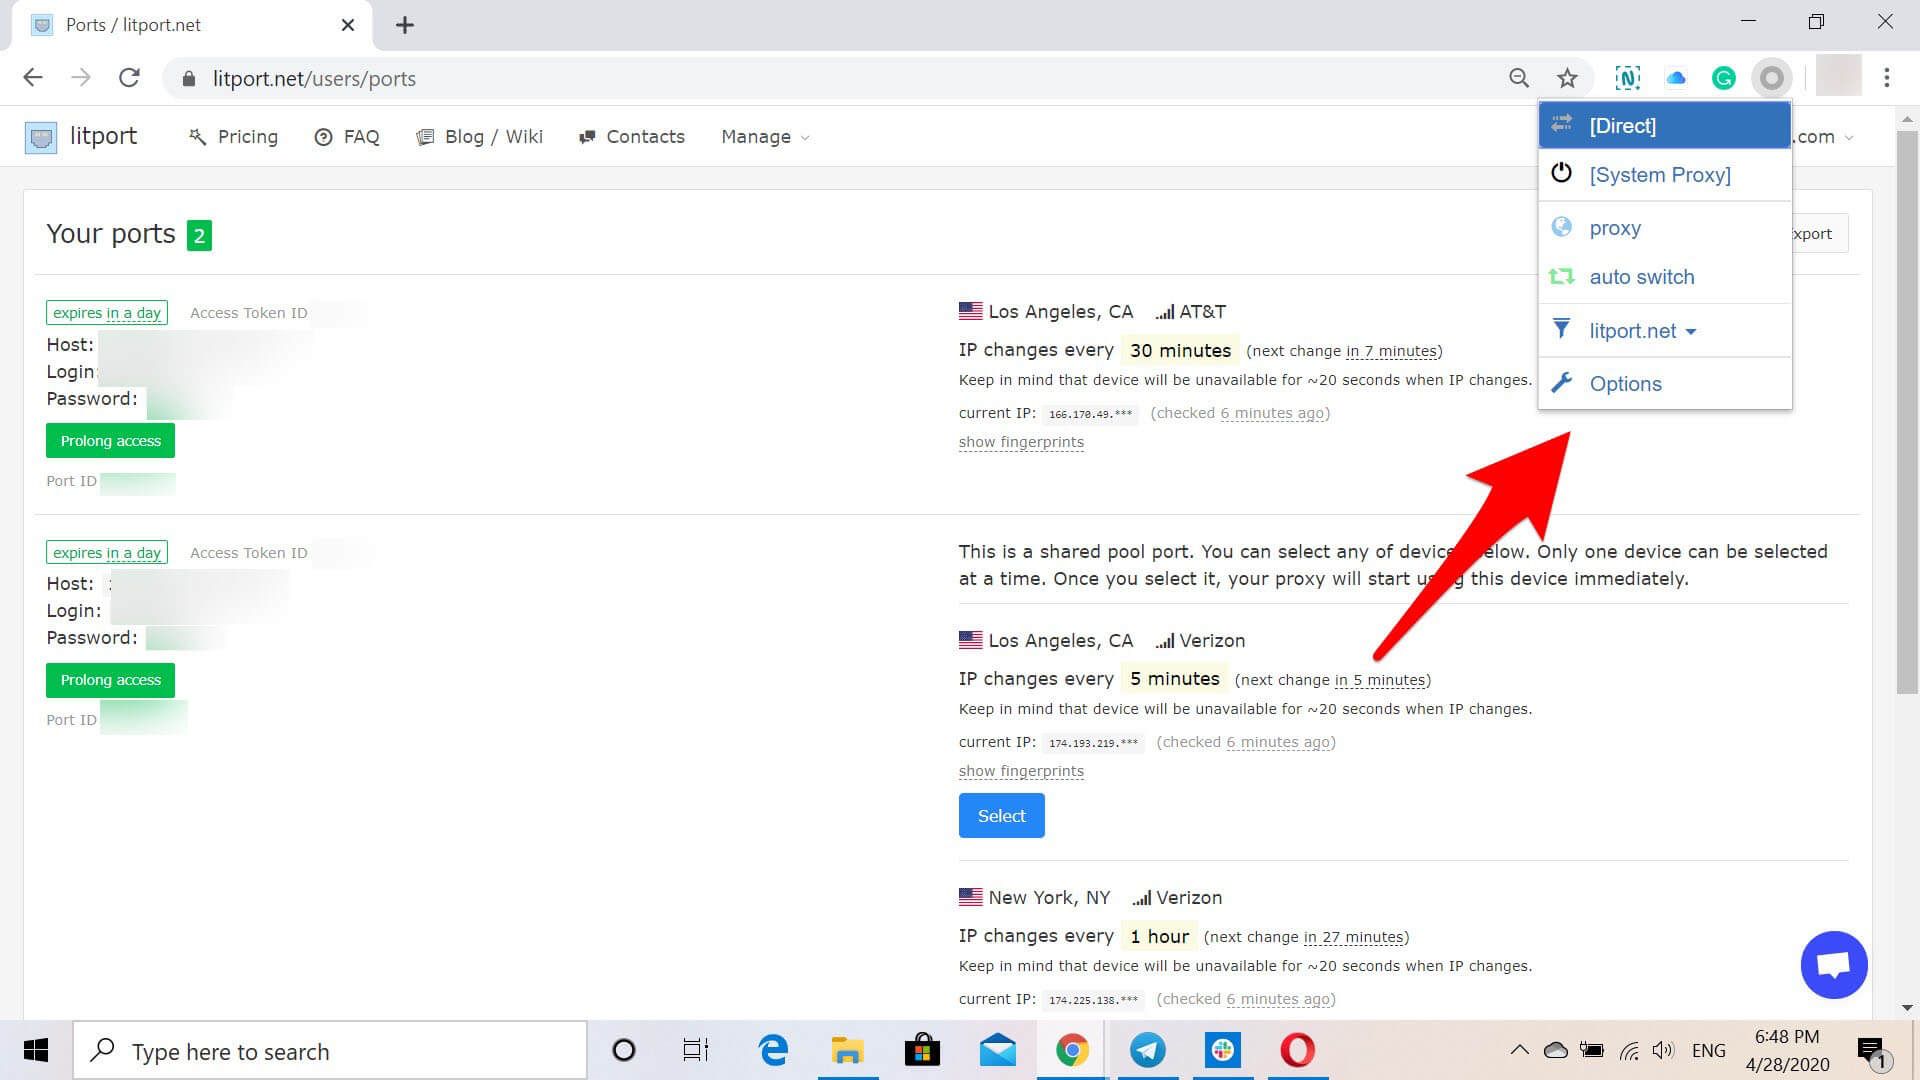
Now you are all set up and it’s time to check how SwitchyOmega extension works. So just head to any website you’d like to use the proxy for. Click on the SwitchyOmega icon at the upper-right corner of your browser. Select the preferred proxy from the list of your profiles and that’s it. Your proxy is on. To check if the proxy is working fine and your actual IP address is not detected, read our article “How to make sure your proxy works”. If you would like to disable proxy, head to the SwitchyOmega menu again, and select [Direct].

Switching between several proxies via SwitchyOmega tool
Now you can use Litport.net proxies with SwitchyOmega extension for your browser and can easily switch between them with one click.
Still not sure which our proxy to choose? Feel free to contact our support team.
Paul Wang
Paul is an experienced web-developer with more 15 years of experience working with proxy servers and scrapers. He helps us on litport.net with software engineering and quality assurance.